How to Beat the New Hotness: Onagers
Irate Pooka here to start us off! It's true that Onagers have been out for a long while at this point, but they didn't hit the tournament scene until just before it ended prematurely owing to covid. I definitely won't claim to be an expert, because I'm not. And this doesn't provide an answer to the dreaded Triple Onager fleets that apparently would have plagued Worlds if the tourney had happened. But it's a starting place for anyone trying to figure out how to take this beastie down, given how many tricks it's got.
Let's start with a couple of Armada basics:
-Do not let fear change your tactics. This sounds a bit hyperbolic, but I wrote about this in a tournament report awhile back; whenever I fly against an SSD, my hands shake a bit and my heart beats a little faster. Why? Because they're huge and dangerous. They're intimidating! So are, in my opinion, the Onager and the Starhawk. The less experience one has against a ship or fleet archetype, the easier it is to get intimidated into bad decisions.
-Know what your opponent can do. I've been guilty of trying to slow roll in order to stay out of Onager's range. It's really ineffective. Those things can pivot and keep hitting you. Even if you slow roll well enough to only get hit at extreme range by red and blue dice, it's not like you're landing any counter-punches, so you're just giving your opponent free shots.
-This includes knowing what they cannot do. Yes, that ignition attack can be nasty. But they can only fire it off once. Also, if they have an ignition shot, they HAVE to take it. What does that mean? It means you can bait the Onager into a shot it doesn't actually want to take, such as on a flotilla or a small ship with Evade. It's too easy to make costly mistakes if you don't know what your opponent can do as well as what they can't do.
-Have a plan. This sounds really basic because it is. But you can't stick to a plan unless you have one, so when you see your enemy's list, make a plan. Adjust that plan after deployment. Then keep making adjustments as the game goes on. But you can't just walk into the match with "attack the Onager, dice break my way, I win!" That is, you can, but I wouldn't advise it.
We now enter the roundtable portion of this piece, as each of us has different ideas on how to tackle the Onager. Take it away, fellas!
Gold Leader:
Before the release of Onager and SH, I felt that the Onager was going to have way more impact on the meta than the SH. After all, SH is basically just a small SSD; hard to kill and lots of firepower, but very pricey. The Onager on the other hand adds a whole new range to the game and has very good dice output on their one good arc. So, how do we evade this little space sniper?
If you can dodge an ISD, you can dodge an Onager
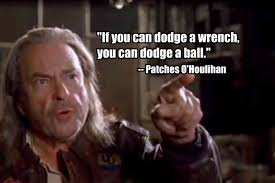
Patches O’Houlihan was the hero the Rebellion needed at the Battle of Yavin IV
You might be thinking “But Gold Leader, the Cymoon is only at long range, the Onager can shoot much further!” And that’s true. But, Cymoon has a wider arc and better maneuverability than the Onager. So if you can learn or already know how to dodge the ISD front arc, you’re on your first step to beating the Onager.
Outstanding Moves

My MC75 moves to C5 and destroys your Onager; Check Mate!
Armada is often a chess match and frequently the movement decides who wins or loses the game. This is why many players consider Navigation Commands to be the most important dials in the game (we’ll come back to this at some point, as Nathan heavily disagrees). So, against the Onager, being able to wiggle in and out of the danger zone will be essential just to just surviving the game. Once you’ve closed the gap, it’s important to get your firepower in the weak spot, the rear. The Onager has very poor shields anywhere but its front, so a side shot is good, but can be redirected to the tanky front. The rear has no such privileges, so you’ll quickly be digging into that Hammerhead’s Hull.
Divide and Conquer

Brace yourselves, the Military History Major is about to get real nerdy on you
Above is the German Wehrmacht’s battle plan for the attack on Moscow. The Wehrmacht followed a doctrine known as Kesselschlacht (Cauldron Battle), the basic tenets of which was to envelope the enemy to surround them and prevent them from retreating. Conversely, the Russians practiced ‘Deep Battle’, which was essentially putting forward a spearhead that widened out as it went further along, much like a Pyramid.
The concept of Kesselschlacht is important to understand when fighting the Onager; you need to split your fleet in order to survive and meet back at the decisive point: the butt of that Onager. This is the one play you need to fight the Onager and come out with a win, unless your opponent can’t roll hits all game because you cooked their dice behind the scenes (don’t do this). If you split your fleet, and the Onager has to target prioritize, it kills one ship on good dice rolls; bad rolls, it kills no ships. Conversely, if you’re going Deep Battle, the Onager can pop your first ship, then instantly target the next ship and work it’s way down your list and send in the rest of his ships to fix your ships in place while the Onager blows them away.
So there’s my take on the 3 Rules of fighting the Onager. I wish I could say that they’re a foolproof method to beating every Onager list, but it’s a dice game and some people are REALLY good at pointing their sniper rifle turn after turn. But, at least these tips will give you a good chance to pull off a big win or at least prevent a bad loss!
Gold Leader, signing off
Lewis:
I have had the opportunity to duke it out with at least one Onager, three times.
Upon reflection, the first two cannot add much to this discussion.The Onager had just been released and was definitely a new toy that had yet to see it’s kinks worked out. For instance, one of the matches saw my opponent take two Onagers and turtle in a corner. Their deployment saw them too close together such that their Rakehell could not turn without bumping the Onager immediately on its side. Frankly, from there, their strategy went to pot and I was able to capitalize by sticking to the fundamentals (focus firing, delaying activation, etc.)
However, just yesterday, I fought an Onager that went to the wire, and there are a few takeaways that I would love to share:
My matchup saw me fly the list found here, against a Darth Vader list consisting of a Kuat, Onager and a Corvus Raider.
The Onager was deployed on the inside of the ISD and Raider as shown below:

My strategy was to employ a ‘pincer move’ (or should I say Kesselschlacht), knowing that my two TRC90s could flank the left side of his formation (potentially delaying the Kuat), while my Liberty went full speed ahead to force a hard turn out of the Onager and prevent the Kuat from bringing it’s devastating arc to bear on my flagship.
The first turn or two saw me take an immediate ‘lead’, destroying Morna Kee and the enemy Raider, whilst taking Boba Fett to 1 remaining hull point. I was feeling great.
However, after that is where I made a mistake concerning the Onager.
Either take its big shot on the chin (or in your arc that has the most of its shields) and maintain a course that will allow you to engage it ASAP, or, don’t take its big shot at all.
I got too cute with my MC80 (that sported auxiliary shield team, two braces and two redirects via Kyrsta), tried to ‘dodge’ the ignition attack and ultimately took it into my port hull zone. This saw me brace 11 damage to 6. Six! It’s not often that you brace a damage pool and still have to take that sort of damage.
This failed attempt at a dodge ultimately meant I never fired my front arc at the Onager. It was able to skirt away before I could, which brings me to my next point…
The Onager is deceptively fast. Be mindful of this.
At first glance, the Onager looks like a long-range threat that’s goal is to lurk at the back of a board and spew hot turbolaser death at your ships. However, through well-timed commands my opponent was able to kick things into high gear (aka speed 3) right when I had closed on his Onager. This came as a surprise to me and ultimately meant that his Onager fled the scene of it’s anti-rebel crimes before I could make him pay for it.
From there, the game was a VERY tight affair. I lost my flagship and transport, before taking his Kuat to 9 damage cards at the end of turn 5. I had four Lancers able to bomb said Kuat however three of them rolled blanks… (Dice hate me.) Luckily, the Kuat flew off the board edge and I ‘won’. Although we lost a lot of good rebels in the process.
In summation, I think I can only reiterate what the other authors have shared.
- Know your enemy.
- Understand exactly how ignition attacks work, how the Onager moves on the table and how it’s deployment will impact your opponent’s strategy.
- Employ a pincer move if possible (aka Kesselschlacht)
- Don’t let the threat of the Onager scare you out of doing what your list does best.
IratePooka:
Thanks, fellas! So yeah, I kinda fall somewhere between the advice above. I won’t reiterate the advice because I think some of it is more situationally useful than other times (hard to take an Onager shot in the face when you’re a Hammerhead or CR90, so maybe work on flanking hard! Hard to maneuver out of that firing arc if you’re an ISD, so don’t be all cute and allow extra shots while you’re trying to arc dodge!), but I’ll rather leave you with a couple of my warnings about the advice we’ve all given:
Employing a pincer move IF ABLE (caps are mine): It is super important to note the “if able” bit, here. In theory, employing a pincer move and forcing a hard choice or arc dodging completely sound fantastic. So does killing off Jaina’s Light when it separates from the pack to gather objective tokens. Easy peasy, right? Except when it’s not. Don’t try and force it, or you will absolutely pay for overcommitting. You wanna chase that CR90? Be my guest! But while you’re on that fool’s errand, your opponent will be happy to steal kills where they can get ‘em. Take what your opponent gives you. If deployment allows you to employ the pincer move, go for it. But if you try and make it happen when it isn’t there, you’ll split up your fleet, be unable to focus your fire, and get positively stomped.
Divide and Conquer: Again, be careful. You really have to have a plan as to how you bring your fleet together again. Otherwise, all you’re doing is feeding your fleet to your opponent in a piecemeal fashion. Splitting up to force hard choices is great. After all, I don’t necessarily need to kill your Demolisher to win the match. I just need to make you fly it skittishly enough that I effectively remove it from the battle. If I’ve done that, I can kill other things and win that way while Demo flies untouched, but also without launching a single black die attack. It’s true that if you go, as Gold Leader says, Deep Battle, then there’s a good chance that the Onager will knock down your ships one at a time. But it depends on what you’re fielding. My first time facing an Onager, I was flying two Gladiator Star Destroyers and a Kuat, all of whom were equipped with 7th Fleet Star Destroyer. I got cute with the Glads and made them dance to try and approach without eating bad attacks from the Onager while my Kuat went in fast to take the flank. What happened? Well, extreme range is pretty extreme. So my Glads danced and ate shots from the Onager anyway. One of them died without throwing any black dice at all, and the second one got off two attacks - one against the incoming Demolisher, and the second against the Onager before exploding. Then the Onager (which had gone first) high-tailed it out of there before my Kuat could lay it out with a haymaker. I didn’t line up my ships for the buzzsaw, but I separated a fleet that could have simply gone in hard on the Onager, eaten the big shots, and maybe I’m trading one Glad for one Onager. That’s trading up, friends. No, that doesn’t work for every fleet. I’m just saying, be aware of what you’re flying and play accordingly.
I agree wholeheartedly with not letting the Onager scare you! But here’s my warning: that doesn’t mean you play your game like it’s any other ship at all. You need to have a plan for it based on what your fleet does best. It may be a tweak of your usual strategy (deploying centrally instead of in a corner so you’ve got more flexibility), or it may be a total change-up (choosing to go first so you’ve got the alpha strike when you normally choose to go second and play your objectives), but you should have a plan for how you’re going to fly against this ship. That plan should fit into something your fleet/ships already do well. For instance, Lewis talked above about how he got a little too dance-crazed with his LMC80 and ended up taking a shot to the side and not getting his front arc on the Onager. Big problem, given that both of those are kind of vital to the survival and success of the LMC80, right? So don’t try to dance if that’s not what your ships are good at. Don’t try to take that beastly Onager head-on if that’s not what your ships are good at. Don’t split up your fleet if you can’t reach the target simultaneously (or at all, if the opponent lines up their Demo across from your Pelta).
Hope y’all have found this to be useful!!
-IratePooka and the rest of the gang here at It’s A Trap

No comments:
Post a Comment